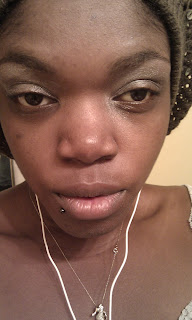
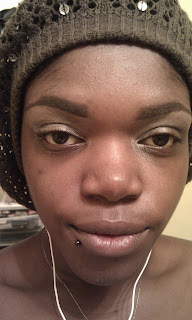
This started out as a tutorial for a sparkly metallic look. As I started going crazier and crazier with my eyeliner I realized this would work well for a Halloween Egyptian type look. So for the Egyptian look stick with the triple liner but if you want something more subtle then just do your liner as you would regularly. This look can also easily be done with other colors.
Materials: Metallic Cream Shadow (I used gold), Loose Glitter in the same color or a complimentary color to your chosen Cream Shadow (I also went with gold), Glitter Liner also in same or complimentary color, Primer, Concealer, Brow Powder, Bridge/Prime Shadow, Dark Brown Eyeshadow, Black Brown Eyeshadow (or just a Darker Brown), Eyeliner, Foundation, Blush, Contour Shade, Highlighter, Nude Lipstick, Translucent Powder, Finishing Spray, Lashes, and Brushes
Start with a clean bare face. You can apply a foundation primer or moisturizer if needed.
Prime your entire lid. I used Urban Decay Primer Potion.
Fill in brows in a shade that is a bit lighter then your natural hair color. I am using NYX Brow Cake with a Sephora angled brow brush.
The brows should look like this. Use any shape you like but just be sure to fill in any gaps and sparse areas.
Make a line underneath the brow using concealer and your brow brush. This is to help conceal stray hairs and define the shape of your brow.
Blend with your fingers or a brush so that it looks more like this.
Use a shadow that is similar in color to your skintone in the area between your crease and the concealer. I used MAC Wedge.
Apply with a fluffy blending brush like so. I used MAC 217. This is to bridge the gap between your lid shadows and brow highlight which gives a more overall blended look.
It should look similar to this.
Now use a metallic cream shadow of your choice. I used MAC Goldspice from the Metal X Collection. Super old collection but it is still one of my favorite shadows :)
Apply all over your lid and slightly above the crease. I usually use my fingers with cream formulas just because I find it spreads easier but you can use a brush if you like.
Blend slightly while applying so it looks like this.
Glitter time! Take a loose glitter in the same color as your metallic cream shadow. Mine is from Make Up For Ever.
Apply all over the cream shadow. Glitter is optional since I know there's crazy people out there who don't like glitter...MADNESS!!
Now, take a matte dark brown shadow. I used MAC Spiced Chocolate...
..and apply in a rounded U shape to the outer V
I usually do are more sharp V shape in this area but I wanted to soften up the outer V since this look already has a lot going on. This is why I chose to do more of a U shape as opposed to a V.
Blend with a tapered blending brush if you have one. I used MAC 222.
Take a Black Brown shadow or very Dark Brown. I am using MAC Smut eyeshadow from one of the Holiday Palettes.
With a small brush retrace over the outer U shape to define.
Like so.
And blend away!
Line your upper lash liner with black eyeliner and a liner brush. I used Stila Smudge Pot Gel Liner.
Create a wing at the end of the liner. If you are doing the triple liner be sure to make the wing slightly higher up then usual so there is room for the other wings.
Line your outer lower lash line but stop before meeting with top liner.
Create a downward sweeping wing at the end of the lower liner.
Grab a matching glitter liner. I am using MAC Glitterpuss from Hello Kitty Collection.
Make a small wing between the two right underneath the top wing.
Also, apply a thin line to the inner corner of the lower lid.
Go over that line several times until you get the intensity you want.
It should look like this now.
Apply concealer and foundation (and make an odd confused face like so :).
Then make a fishy face and apply contour powder.
This is how the contouring looks. I don't like to contour too heavy because outside of photoshoots and things like that it not an easy look to pull off.
Apply a neutral toned blush to the apples of your cheeks. I used MAC Sweet As Cocoa.
Then apply a highlighter to the top of your cheekbones. I used MAC Star Iridescent Pressed Powder.
This is how the cheeks are looking.
Apply and blend translucent powder all over you face. I am using Ben Nye Neutral Set with a Bourjois Cosmetics kabuki brush.
Mist face with a finishing spray. I used MAC Fix +to tone down the powdery look. This is optional but helps make your makeup look less like powder and more like skin.
Apply lashes and Nude Lipstick. I used MAC Touch
Then mascara..
Make some ridiculous faces..
TADAA!!!


What a beauty!!!!
ReplyDeleteCheck out this blog....
ReplyDeletedelicatehummingbird.blogspot.com
thought you may like it. You'll probably get lost in it for a few hours lol.
aaah you knew that blog was just gonna make me want to buy more makeup!! with all those reviews!! SLYYY WOMANNN!!!
ReplyDelete